“I don't have access to…”: A Guide to MCP

You: Hey AI, what did Prime last tweet about?
AI: I don’t have access to Twitter / X.
You: Okay, whatever—just tell me if Vercel has any incidents right now.
AI: I can’t browse the internet.
Bruh.
At this point, you’re wondering why this “intelligent” model can refactor your code and explain monads, but the second you need real data, it turns into a glorified chat with a cardboard. It’s like working with a senior dev who knows everything—except how to Google (Tom?).
Now imagine if your AI assistant could actually fetch that data. If it could query APIs, check package versions, get fresh docs, even pull live system statuses—just like you would. No more stale responses. No more tab-switching. No more “I don’t have access to…” nonsense.
That’s where MCP (Model Context Protocol) comes in. Let’s break down how it works and how you could build your own servers to provide your LLMs with any data you’d want.
Before we start, If you want to dive deeper into how MCP actually works and how it is similar yet different from LSPs, check out this video by Akshit from Maxim AI. He breaks down the architecture, use cases, and how MCP enables real-time, AI-powered workflows.
Spoiler alert: We are starting a series exploring more about “What’s new in AI”—make sure to subscribe to stay on top of cool stuff like MCP! 🚀
Core Components
Hosts, Clients, and Servers in MCP
In the MCP ecosystem, three core components orchestrate the seamless interaction between AI models and external data sources: hosts, clients, and servers.
- Hosts: These are the environments where AI models operate, managing connections and interactions with various services.
- Servers: These are lightweight programs that expose specific functionalities through the MCP protocol. They can provide access to data sources like files, databases, or APIs, enabling AI models to retrieve real-time information securely.
// Creating a Basic MCP Server in TypeScript

import { McpServer } from "@modelcontextprotocol/sdk/server/mcp.js";

const server = new McpServer({
    name: "CustomerMcpServer",
    version: "1.0.0",
});
- Clients: Within the Hosts, clients initiate requests and communicate with MCP servers to perform tasks or access resources. They act as intermediaries, ensuring that the AI's queries are directed to the appropriate services.
// Creating a Basic MCP Client in TypeScript

import { Client } from "@modelcontextprotocol/sdk/client/index.js";

const client = new Client({
    name: "MyMCPServer",
    version: "1.0.0",
});
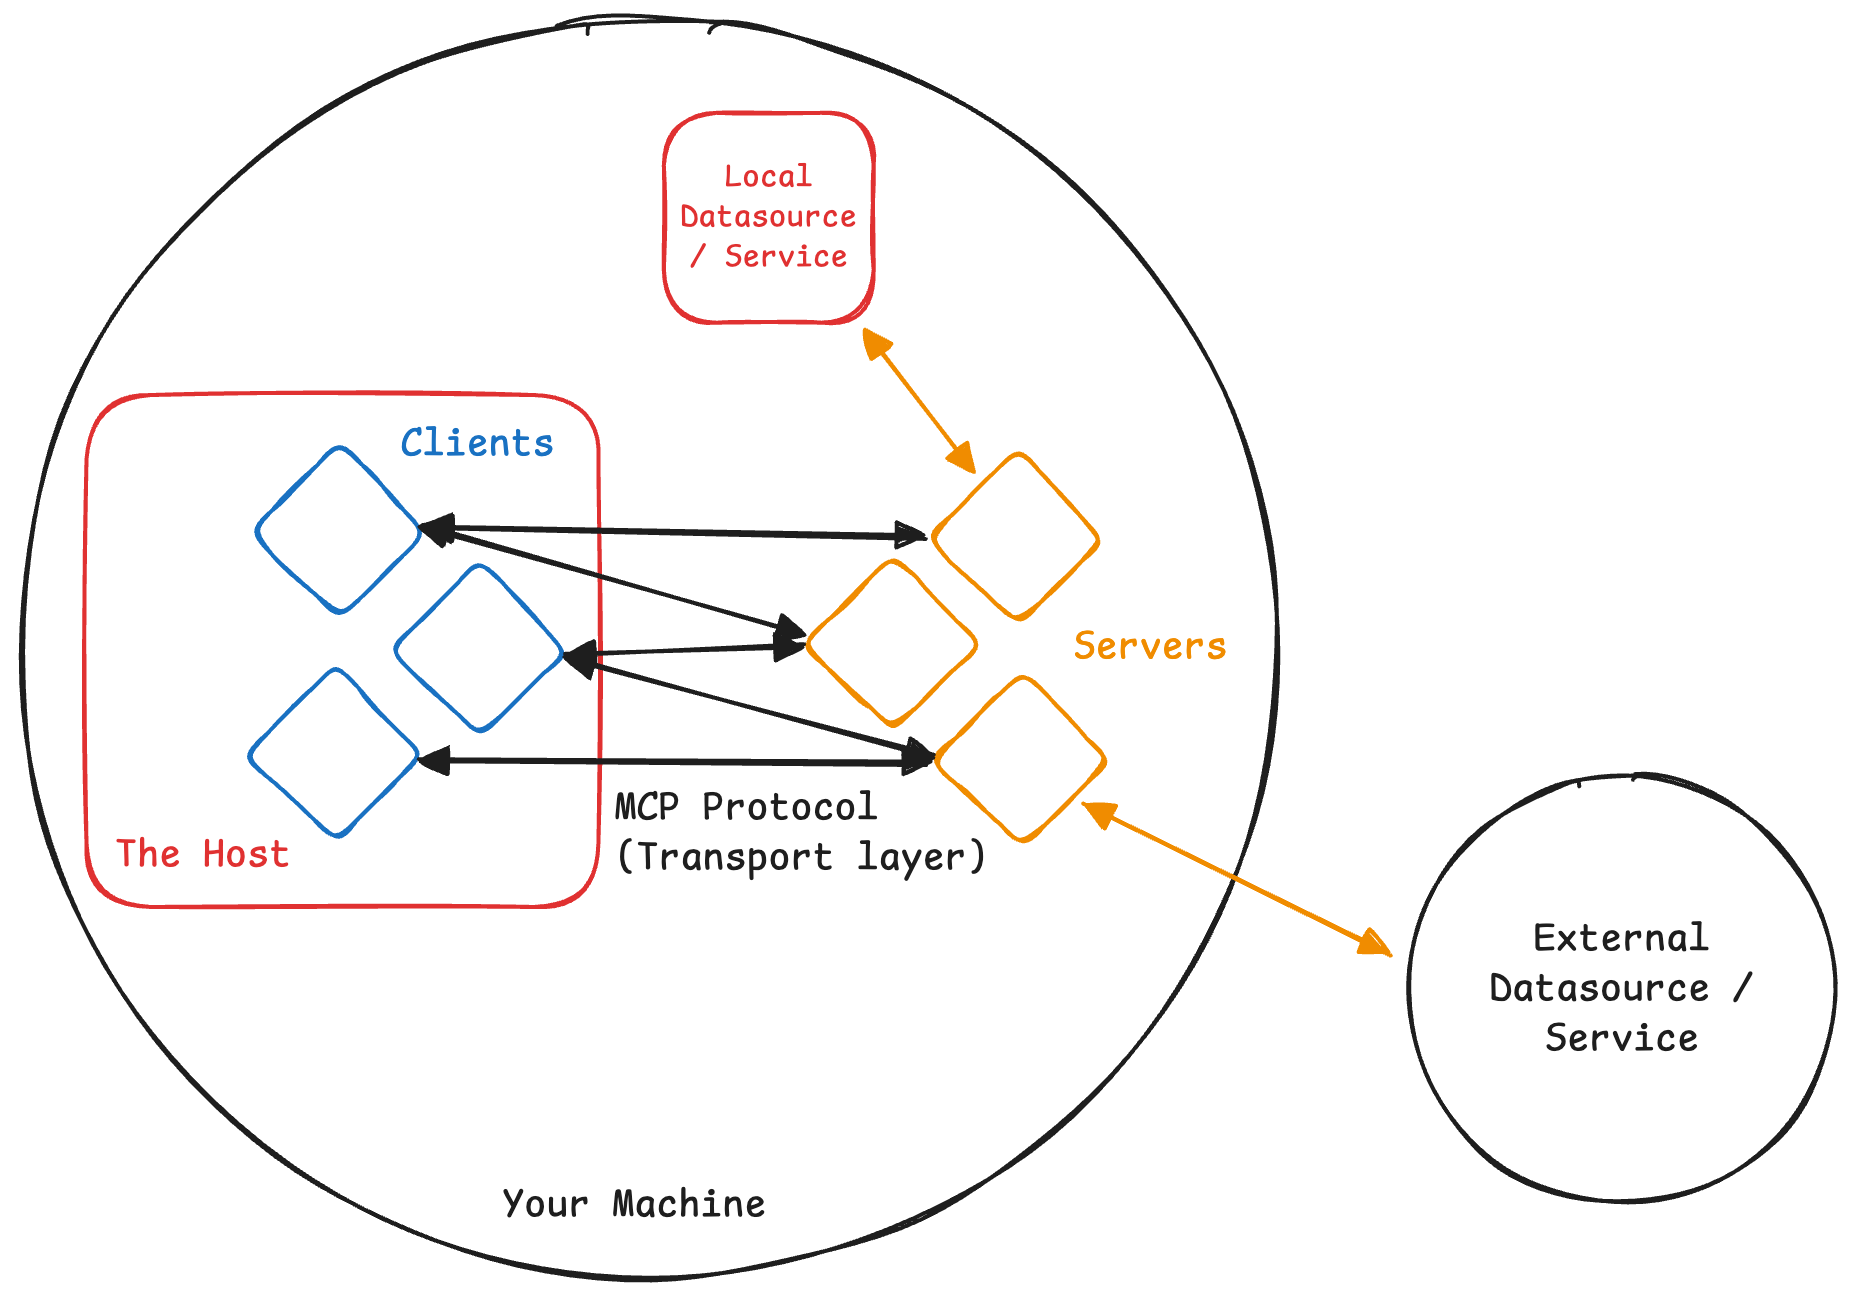
Transport Layer /┆\
The transport layer is crucial for facilitating communication between clients and servers. It determines how data packets are transmitted, ensuring that messages are sent and received effectively.
Understanding the available transport mechanisms and their appropriate use cases is essential for optimizing your AI integrations.
Types of MCP Transports
MCP supports two primary transport mechanisms
HTTP with Server-Sent Events (SSE) Transport
This approach employs HTTP POST requests for client-to-server messages and Server-Sent Events for server-to-client communications.
It's ideal for distributed systems where clients and servers are on different machines or networks, offering more flexibility for remote interactions.
// Using an SSE transport for server

import { SSEServerTransport } from "@modelcontextprotocol/sdk/server/sse.js";
import express from "express";

// ...Server implementation

const app = express();

let transport: SSEServerTransport | null = null;

app.get("/mcp-server/start", (req, res) => {
    if (!transport) {
        transport = new SSEServerTransport("/messages", res);
        server.connect(transport);
    }
});

app.post("/mcp-server/messages", (req, res) => {
    if (transport) {
        transport.handlePostMessage(req, res);
    }
});

app.listen(3000);
// Using an SSE transport for client

import { SSEClientTransport } from "@modelcontextprotocol/sdk/client/sse.js";

// ...Client implementation

const transport = new SSEClientTransport(
    new URL("<http://localhost:3000/mcp-server/start>"),
);
await client.connect(transport);
Stdio Transport
This mechanism utilizes standard OS input/output streams for communication.
It's particularly suitable for local integrations and command-line tools, where both the client and server operate on the same machine.
// Using an stdio transport for server

import { StdioServerTransport } from "@modelcontextprotocol/sdk/server/stdio.js";

// ...Server implementation

const transport = new StdioServerTransport();
await server.connect(transport);
// Using an stdio transport for client

import { StdioClientTransport } from "@modelcontextprotocol/sdk/client/stdio.js";

// ...Client implementation

const transport = new StdioClientTransport({
    command: "node",
    args: ["/ABSOLUTE/PATH/TO/SERVER/index.js"],
});
await client.connect(transport);
console.error. Local MCP servers should not log messages to stdout (standard out), as this will interfere with protocol operation.
Choosing the Right Transport
Selecting the appropriate transport mechanism depends on your specific use case:
- Stdio Transport: Opt for this when developing locally or working with command-line tools that require direct and straightforward communication between processes on the same machine.
Its simplicity makes it excellent for rapid development and testing. - HTTP with SSE Transport: Choose this for distributed environments where clients and servers are separated across different systems or networks.
It facilitates real-time updates and is well-suited for scenarios requiring asynchronous server-to-client communications.
While both transport methods are viable, the stdio transport is often preferred due to its simplicity and direct process communication. The official MCP specification recommends that clients support stdio whenever possible.
This preference might stem from the ease of implementation and the straightforward nature of local MCP servers; as they can be easily implemented to interface with an external API.
Servers and Their Capabilities
A server works by exposing capabilities to the client, who then uses these capabilities to form the context as required. There are mainly 3 types of capabilities, which I have tried to explain via a kitchen analogy.
Resources 📚
These are just straight up raw datasources; can be considered to be your raw ingredients. Whether it’s files, databases, or APIs, resources provide the essential data.
In your server, you simply expose resources that a user can query and attach. Some clients can also use heuristics to automatically attach resources.
// Exposing a resource via the server

import fs from "fs";

// ...Server implementation with transport

server.resource(
    "Neovim init.lua File", // name
    "file:///PATH/TO/init.lua", // URI
    (uri) => {
        // Read the init.lua file and return the content
        const text = fs.readFileSync(uri, "utf8");
        return {
            contents: [
                {
                    uri: uri.toString(),
                    text,
                    mimeType: "text/plain",
                },
            ],
        };
    }
);
Prompts 📝
Mainly prompt templates / workflows, clients can present them to the users or LLMs to use, these are essentially your recipes.
The templates can be populated using dynamic arguments and also include contexts (from your resources). This mainly just enables the clients to better prompt and guide the LLMs to get a better result.
// Exposing a prompt via the server

import { z } from "zod";
import fs from "fs";

// ...Server implementation with transport

const NVIM_CONFIG_DIR = "/ABSOLUTE/PATH/TO/NVIM/CONFIG/DIR";

server.prompt(
    "optimize-neovim-config", // name
    "Optimize Neovim configuration for better performance.", //description
    {
        additionalGoals: z
            .string()
            .optional()
            .describe(
                "Additional goals to optimize for (e.g. faster lsp initialization, buffer management)",
            ),
    }, // input schema
    ({ additionalGoals }) => {
        return {
            description: `Optimize Neovim configuration for better performance${additionalGoals ? ` and ${additionalGoals}` : ""}.`,
            messages: [
                {
                    role: "user",
                    content: {
                        type: "text",
                        text: `Please analyze and optimize the Neovim configuration files to reduce startup time and streamline plugin management.${additionalGoals ? ` Additionally, focus on optimizing for ${additionalGoals}.` : ""} The configuration spans multiple files. At the end, utilize the "write-to-lua-file" tool provided to you to write it back to the configuration files. Make sure to pass in the proper absoulte path for each file and give it's content to the tool. Keep in mind that the root directory for the nvim config is ${NVIM_CONFIG_DIR}`,
                    },
                },
            ],
        };
    },
);
Tools 🔨
Tools are mainly used to perform actions in the real world, they can be used for interfacing with external systems or purely just for computation; think of them as your utensils. You can expose data similar to Resources via tools by just returning the data without any mutation.
Thus the difference is that Tools can have side effects / mutate the state while Resources should purely just return data and not have any effect on the state.
// Exposing a tool via the server

import { z } from "zod";
import fs from "fs";

// ...Server implementation with transport

const NVIM_CONFIG_DIR = "/ABSOLUTE/PATH/TO/NVIM/CONFIG/DIR";

server.tool(
    "write-to-lua-file", // name
    "Write some content to any .lua file on your file system", // description
    {
        luaFileUri: z
            .string()
            .url()
            .describe("The URI of any .lua file (e.g., file:///PATH/TO/file.lua)"),
        content: z
            .string()
            .describe("The content to write to the configuration file"),
    }, // input schema
    ({ luaFileUri, content }) => {
        // try-catch block so that errors are not thrown,
        // but rather handled gracefully so the LLM knows what to do next
        try {
            // Convert URI to filesystem path
            const luaFilePath = new URL(luaFileUri).pathname;

            // Check if file is in the Neovim configuration directory
            if (!luaFilePath.startsWith(NVIM_CONFIG_DIR)) {
                return {
                    isError: true,
                    content: [
                        {
                            type: "text",
                            text: "Error: File must be in the Neovim configuration directory",
                        },
                    ],
                };
            }

            // Check if file is a .lua file
            if (!luaFilePath.endsWith(".lua")) {
                return {
                    isError: true,
                    content: [
                        {
                            type: "text",
                            text: "Error: File must be a .lua file",
                        },
                    ],
                };
            }

            // Write the content to the config file
            fs.writeFileSync(luaFilePath, content, "utf-8");

            // Return success message
            return {
                content: [
                    {
                        type: "text",
                        text: `Successfully wrote content to ${luaFilePath}`,
                    },
                ],
            };
        } catch (error: unknown) {
            // Handle any errors that occur during file writing
            let errorMessage;
            if (error instanceof Error) {
                errorMessage = error.message;
            } else {
                errorMessage = error;
            }

            // Return error response
            return {
                isError: true,
                content: [
                    {
                        type: "text",
                        text: `Error writing to config file: ${errorMessage}`,
                    },
                ],
            };
        }
    },
);
This approach ensures that the LLM can access and potentially handle the error information effectively.
A Complete Example of an MCP Server
The example here defines an MCP server to manage and optimize Neovim configuration files.
It scans your neovim config directory for .lua files, exposes them as resources, and provides a structured way to read, modify, and write them.
A tool is provided to safely write updates to configuration files.
This server also includes a prompt that allows users to directly prompt the LLM to improve Neovim's performance with any other goals (optional).
import {
    McpServer,
    ResourceTemplate,
} from "@modelcontextprotocol/sdk/server/mcp.js";
import { StdioServerTransport } from "@modelcontextprotocol/sdk/server/stdio.js";
import fs from "fs";
import { z } from "zod";

// Create server instance
const server = new McpServer({
    name: "nvim-optimizer",
    version: "1.0.0",
});

// Replace this with your actual neovim config directory
const NVIM_CONFIG_DIR = "/ABSOLUTE/PATH/TO/NVIM/CONFIG/DIR";

// Resources can also be listed together using ResourceTemplates
// rather than directly giving each file's URI
server.resource(
    "Neovim Configuration",
    new ResourceTemplate("nvim://{+file}.lua", {
        list: () => {
            const configDir = new URL(`file://${NVIM_CONFIG_DIR}`).pathname;

            // Function to recursively read all .lua files in a directory
            const readLuaFiles = (dir: string): { path: string }[] => {
                let results: { path: string }[] = [];
                const items = fs.readdirSync(dir);

                items.forEach((item) => {
                    const fullPath = `${dir}/${item}`;
                    const stat = fs.statSync(fullPath);

                    if (stat.isDirectory()) {
                        results = results.concat(readLuaFiles(fullPath));
                    } else if (item.endsWith(".lua")) {
                        results.push({
                            path: fullPath,
                        });
                    }
                });

                return results;
            };

            // Read all Lua files
            const allConfigs = readLuaFiles(configDir);

            return {
                resources: allConfigs.map((file) => ({
                    name: file.path.split("/")[file.path.split("/").length - 1],
                    uri: `nvim://${file.path.split(NVIM_CONFIG_DIR + "/")[1]}`,
                    mimeType: "application/x-lua",
                })),
            };
        },
    }),
    (uri) => {
        // Get the file path from the URI
        const relativePath = uri.href.split("nvim://")[1];
        const luaFilePath = `${NVIM_CONFIG_DIR}/${relativePath}`;

        const stat = fs.statSync(luaFilePath);

        if (stat.isDirectory() || !luaFilePath.endsWith(".lua")) {
            throw new Error("Invalid Lua file");
        } else {
            return {
                contents: [
                    {
                        uri: uri.toString(),
                        text: fs.readFileSync(luaFilePath, "utf-8"),
                        mimeType: "application/x-lua",
                    },
                ],
            };
        }
    },
);

server.prompt(
    "optimize-neovim-config",
    "Optimize Neovim configuration for better performance.",
    {
        additionalGoals: z
            .string()
            .optional()
            .describe(
                "Additional goals to optimize for (e.g. faster lsp initialization, buffer management)",
            ),
    },
    ({ additionalGoals }) => {
        return {
            description: `Optimize Neovim configuration for better performance${additionalGoals ? ` and ${additionalGoals}` : ""}.`,
            messages: [
                {
                    role: "user",
                    content: {
                        type: "text",
                        text: `Please analyze and optimize the Neovim configuration files to reduce startup time and streamline plugin management.${additionalGoals ? ` Additionally, focus on optimizing for ${additionalGoals}.` : ""} The configuration spans multiple files. At the end, utilize the "write-to-lua-file" tool provided to you to write it back to the configuration files. Make sure to pass in the proper absoulte path for each file and give it's content to the tool. Keep in mind that the root directory for the nvim config is ${NVIM_CONFIG_DIR}`,
                    },
                },
            ],
        };
    },
);

server.tool(
    "write-to-lua-file",
    "Write some content to any .lua file on your file system",
    {
        luaFileUri: z
            .string()
            .url()
            .describe("The URI of any .lua file (e.g., file:///PATH/TO/file.lua)"),
        content: z
            .string()
            .describe("The content to write to the configuration file"),
    },
    ({ luaFileUri, content }) => {
        // try-catch block so that errors are not thrown,
        // but rather handled gracefully so the LLM knows what to do next
        try {
            const luaFilePath = new URL(luaFileUri).pathname;

            if (!luaFilePath.startsWith(NVIM_CONFIG_DIR)) {
                return {
                    isError: true,
                    content: [
                        {
                            type: "text",
                            text: "Error: File must be in the Neovim configuration directory",
                        },
                    ],
                };
            }

            if (!luaFilePath.endsWith(".lua")) {
                return {
                    isError: true,
                    content: [
                        {
                            type: "text",
                            text: "Error: File must be a .lua file",
                        },
                    ],
                };
            }

            fs.writeFileSync(luaFilePath, content, "utf-8");

            return {
                content: [
                    {
                        type: "text",
                        text: `Successfully wrote content to ${luaFilePath}`,
                    },
                ],
            };
        } catch (error: unknown) {
            let errorMessage;
            if (error instanceof Error) {
                errorMessage = error.message;
            } else {
                errorMessage = error;
            }

            return {
                isError: true,
                content: [
                    {
                        type: "text",
                        text: `Error writing to config file: ${errorMessage}`,
                    },
                ],
            };
        }
    },
);

try {
    const transport = new StdioServerTransport();
    await server.connect(transport);
    console.error("Neovim Optimizer MCP Server running on stdio");
} catch (error) {
    console.error("Fatal error in main():", error);
    process.exit(1);
}
Make sure to replace NVIM_CONFIG_DIR with your actual neovim config directoryUsing the Server with ❋ Claude Desktop
To integrate the previously configured server with Claude Desktop using the Model Context Protocol (MCP), follow these steps:
1. Ensure Claude Desktop is Installed
Begin by downloading and installing Claude Desktop for your operating system (macOS or Windows). If it's already installed, verify that you're using the latest version by selecting "Check for Updates" in the Claude menu.
2. Verify Node.js Installation
The server requires Node.js to function. To check if Node.js is installed:
- Open your terminal (macOS) or command prompt (Windows).
- Type
node --versionand press Enter.
If a version number appears, Node.js is installed. If not, download and install it from the official Node.js website.
3. Configure Claude Desktop to Recognize the Server
Claude Desktop uses a configuration file to manage MCP servers. To set it up:
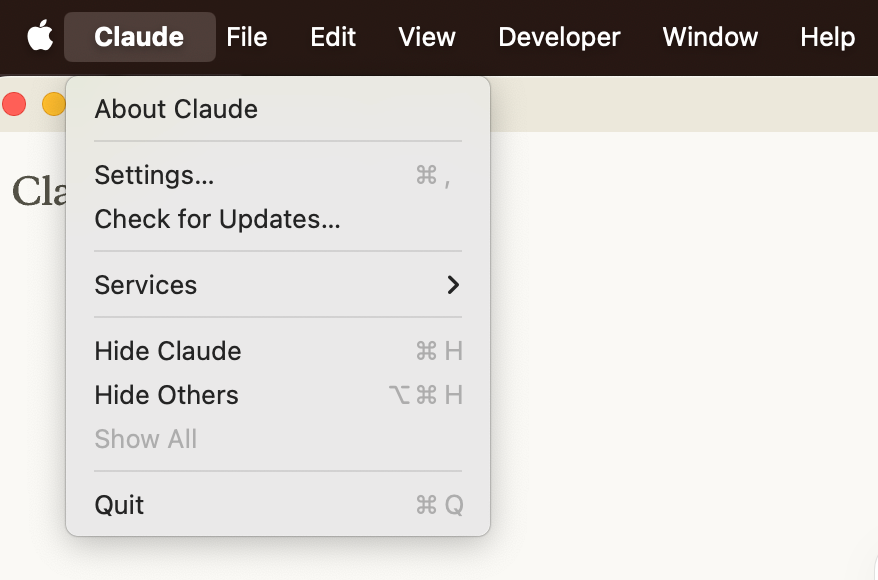
- Open Claude Desktop and navigate to "Settings" from the Claude menu.
- Select the "Developer" section and click "Edit Config."
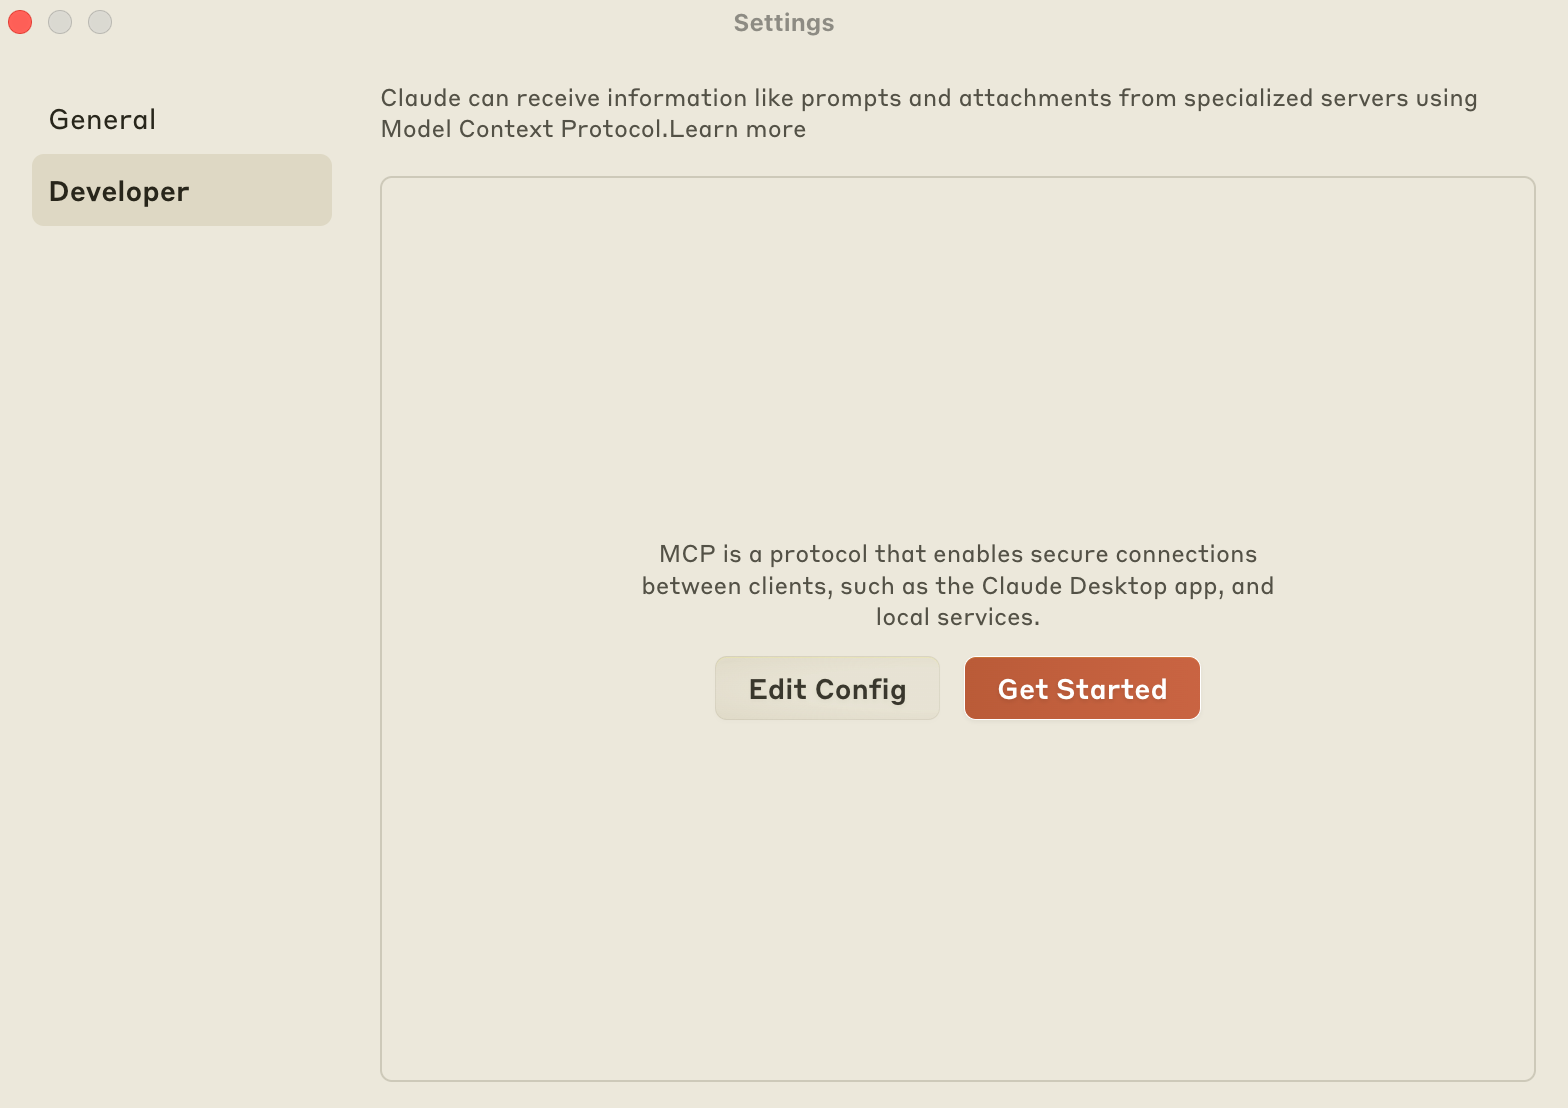
- This action opens (or creates) the configuration file located at:
macOS:~/Library/Application Support/Claude/claude_desktop_config.json
Windows:%APPDATA%\\Claude\\claude_desktop_config.json
In this file, define your server configuration. For example, to integrate our server:
{
  "mcpServers": {
    "filesystem": {
      "command": "node",
      "args": ["/PATH/TO/BUILD/index.js"],
    }
  }
}
Replace PATH/TO/BUILD/index.js with your actual build path.4. Restart Claude Desktop
After saving the configuration file, restart Claude Desktop to apply the changes.
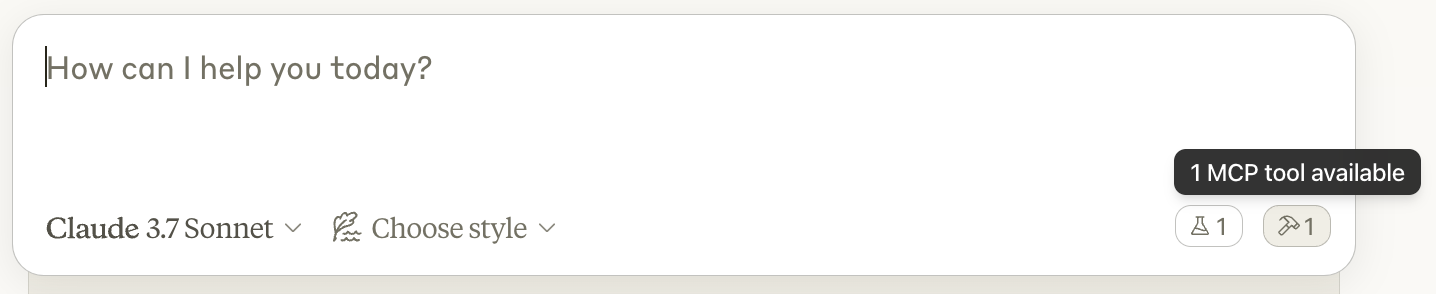
Upon relaunch, a hammer icon should appear at the bottom right corner of the input box, indicating the presence of MCP tools.
5. Utilize the Server's Capabilities
With the server integrated, you can now use all of your resources, prompt templates and tools.
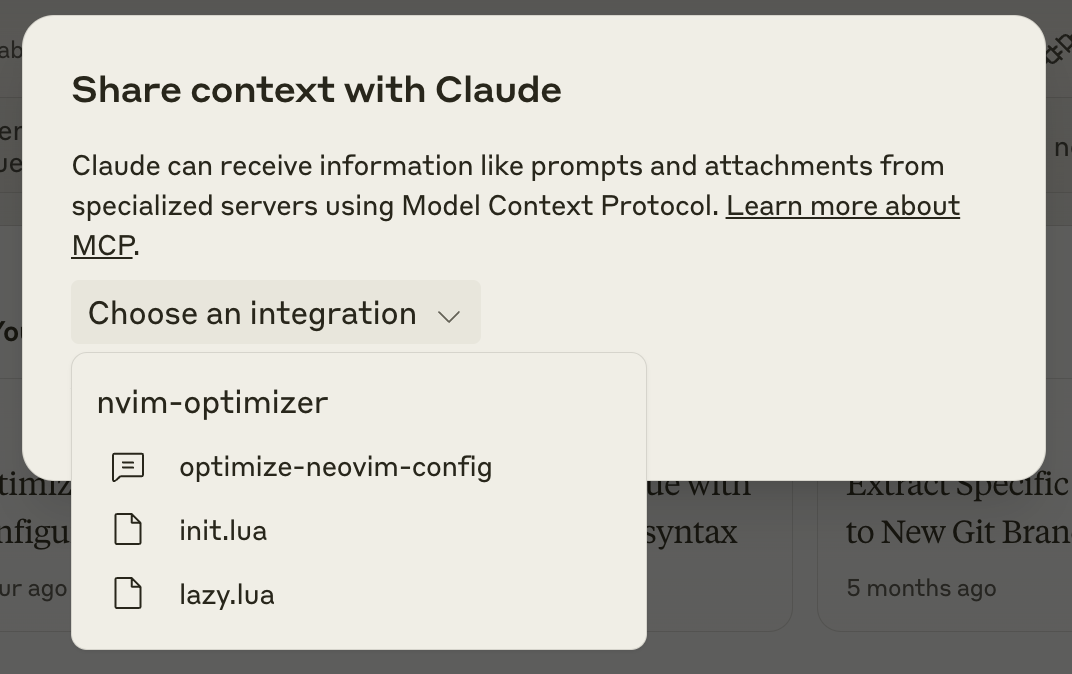
- Access your resources and prompt templates via the Plug icon (located towards the right, just below your input box)
- You will have to manually attach resources for Claude Desktop to use, although clients can also use heuristics to automatically attach resources.
- Prompt templates have to be used manually.
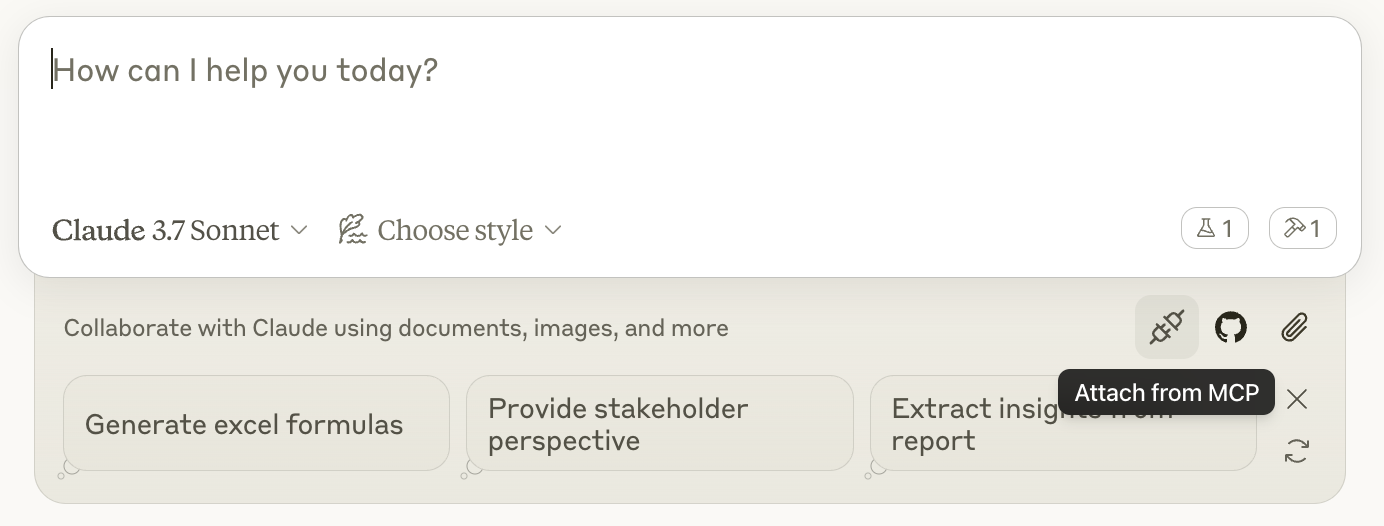
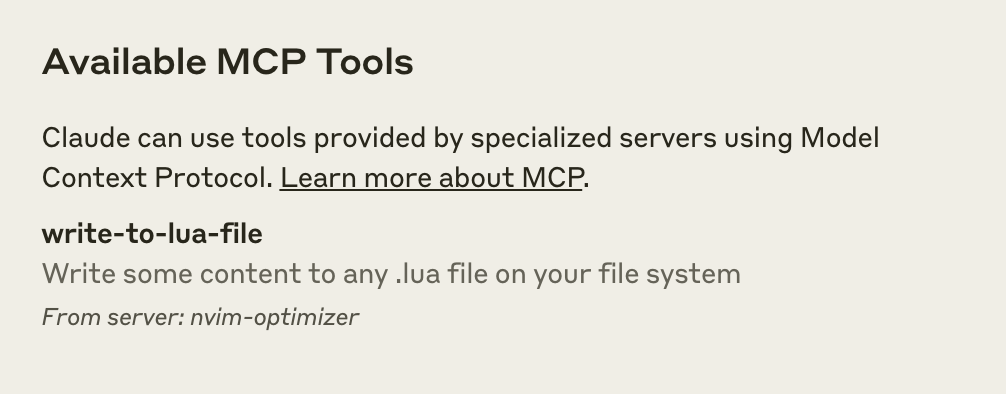
- See a list of configured tools by clicking on the Hammer icon that indicates the presence of MCP tools.
- Claude will request your permission before executing any tools.
It automatically triggers a tool, you do not have to have to do anything as a user.
6. Troubleshooting
If the server doesn't appear or function as expected:
- Ensure the configuration file syntax is correct and paths are valid.
- Verify that Node.js is properly installed and accessible.
- Check Claude's logs for errors:
- macOS:
~/Library/Logs/Claude/mcp.log - Windows:
%APPDATA%\\Claude\\logs\\mcp.log
- macOS:
- Attempt to run the server manually in the terminal to identify any issues.
- Finally if nothing works, you can setup the Inspector to manually trigger commands and figure out the issue.
Peace Nerds
This was the basics of working with an MCP, its architecture, communication protocols, and integration strategies.
This groundwork was essential for what’s about to come next. We will be constructing both an MCP client and server from scratch :)
This project will include interfacing with external APIs, specifically utilizing Maxim AI's open APIs to trigger test runs for various workflows and prompts (All done via interacting with an LLM 🫱🏻🫲🏼).
Maxim AI offers an end-to-end evaluation and observability platform designed to enhance the reliability and speed of AI agent deployment. By integrating these APIs, we aim to make a better testing flow that is dynamic and intelligent.